
Quality control review of image markups
The Blackout Markup Review Pane
What to know
- The Blackout Markup Review Pane will show all markups on the document, including those created by Blackout or placed manually.
- Markups from all markup sets will appear in the Blackout Markup Review Pane.
- Once Blackout processes a set of documents, the reviewer can then use the Blackout Markup Review Pane button to review the applied redactions and highlights from within the Relativity viewer.
- Markups are applied only to the image of a document, so to review redactions and highlights, open the document, and select the Image view.
- Once the document viewer is in Image view, and a document has markups, the document navigation bar will appear below the viewer with the Blackout Markup Review Pane button now visible.

How to do it
- Choose the markup set that will be reviewed from the dropdown within the bottom left of the viewer.
- In the lower left corner of the viewer, locate and open the Blackout Markup Review Pane using the
 button.
 - Click the
 button to open the sub-menu.
 - Choose the Markup Review sub-menu.
- The columns in the Blackout Markup Review Pane will show the information below about each markup.
| Column Name | Description |
|---|---|
| Approved | For all markups created by Blackout, there will be an Accept button and a Reject button |
| Origin | This column shows how the markup was created |
| Page | This column indicates on which page the markup appears |
| Marked Text | This column shows the text that is hidden by the markup |
| Rule | This column shows the rule used to create the markup |
| Markup Type | This column indicates the type of markup applied - redaction or highlight |
| Markup SubType | This column indicates the subtype – such as black box, cross, text, or the highlight color |
| Markup Text | If the Markup SubType was set to “Text,” this column will show the text within the markup |
| Markup Set | This column indicates the markup set to which the redaction or highlight belongs |
View Text and View hocr Buttons
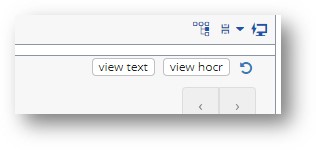
The View Text button will show what Blackout uses to run rules against. This is the processed OCR into a human (and blackout matching engine) readable format
The View hocr button is a system field useful for blackout troubleshooting. In only the most rare of circumstatnces should people look at this.
Accepting / Rejecting Markups
What to know
- After a Blackout job processes the document set, all of the generated markups will appear within the document as “unresolved markups,” that is, markups requiring action from the reviewer to accept or reject them.
- Accepting and rejecting markups is done within the Blackout Markup Review Pane, using the Accept or Reject buttons.
What to consider
- If a markup is accepted, that markup is kept within the document.
- If a markup is rejected, the markup is removed from the document.
- Either way, the markup will no longer be considered 'unresolved' and the markup will remain in the Blackout Markup Review Pane where the reviewer can change the resolution as needed.
- If a Blackout markup is manually edited before it is rejected or deleted, and is subsequently accepted, the markup will return to the state it was in before it was manually edited.
The Blackout - Has Unresolved Markups document field
What to know
- Blackout creates a “Blackout Has Unresolved Markups” document field upon install of the application.
- Any document that has been processed by Blackout will have a 'Yes' or 'No' value for this field.
- Documents that have not been processed by Blackout will have a value of 'Unset'.
- This field is useful in determining which documents have been processed by Blackout, as well as which documents have unresolved redactions or highlights.