
Chronicle Settings
The Chronicle Settings Tab offers users the ability to customize various aspects of Chronicle. The settings are tailored to enhance the display and organization of information within the workspace. Two key features provided within this tab are the Custom Value Delimiter and Entity Tagging.
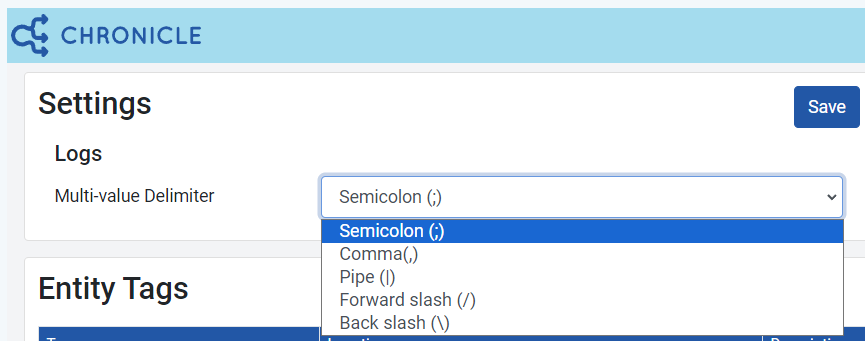
Custom Value Delimiter
This dropdown can be used to customize the delimiter between each value when displaying a multiple-choice or multiple-object field in a privilege log. The setting is unique to the workspace.
The default value is Semicolon, but users can choose between the following options:
- Semicolon
- Comma
- Pipe
- Forward slash
- Backslash
Entity Tagging
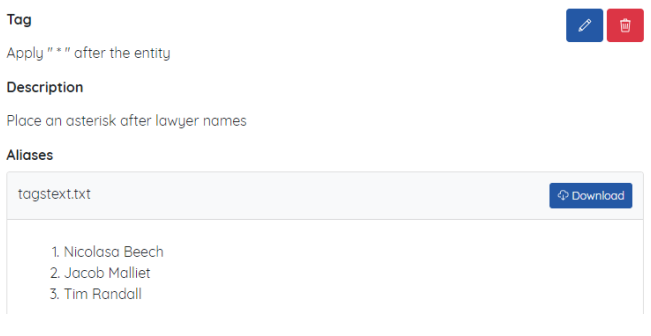
Entity tagging is a simple tool for mass appending additional text to different words throughout the privilege logs in a workspace. For example, if a list of Am Law 100 lawyers is added to an entity tagging rule, all of their names can have an asterisk appended throughout each privilege log automatically denoting them as a lawyer on the case.
You may also use the new Participant Log in Chronicle 2.4 for a similar functionality.
Setting up an Entity Tag
- To create a new entity tag, a list of entities must be created. This is accomplished by creating a text document with the extenstion .txt that contains each entity on a new line.
- The text that is included in this file will be matched exactly
- Each entity must be on a separate line
- Navigate to the Chronicle > Settings tab
- Click New Entity Tag
- Enter in the tag that will be placed on the entity in text box under ‘Tag’
- This will be the text that will be appended either before or after each entity
- A sample of the outcome is displayed under the text box
- Select either Before or After to the right of the tag box
- The preview will update accordingly
- Enter a brief description for the entity tag in the Tag Description box
- Under Alias File, click on Choose a file… or Browse button then navigate to and select the text file created previously
- Click Submit to upload the file
- The tag will then be immediately applied to all privilege logs in the workspace
- No Relativity field coding will be changed by this process
Entity tags can be edited or deleted at any time using the Edit and Delete icons after selecting an entity tag from the Settings tab.
Similarity Slider Instance Setting
The similarity slider can be used to adjust the matching level for the original values. To the farthest right will only show exact matches and further to the left will show less and less similar matches to the original value.
A system admin can modify the default value displayed by adjusting the instance setting, DefaultMinSimilarityPercentage.
- Section: Milyli.Chronicle
- Name: DefaultMinSimilarityPercentage
- Type: Int
- Value: 75
- DefaultValue: 75